Extendable Legs For Alesis Nitro Drum Kit To Make It Taller
Alesis Nitro Drum Set Leg Extensions

Real quick intro story: I had an Alesis DM6 that I bought from musician's friend back around 2010 because we moved from a house to an apartment and had to keep the noise down. That DM6 was great for eDrums, especially compared to others of the same price range of about $600. We moved back into a house and I found a great deal on a Pearl Import kit and sold the DM6. Sold them online to a guy who was buying them for his brat kid that was just banging on them just to hit something. I told that dad, if [when] your kid is all done banging on these and you want to get rid of them, I'll try to buy them back if I had money. I think my wife ran into the dad in town and he said he sold them to someone else, oh well.
Fast foward to today. I wanted a DM6 but now many years have gone by. The closest thing I could find was the Nitro kit and it was around black friday so I took the plunge. Again impressed with Alesis! This low cost kit is great for what I want to do now which is mostly home recording. I also can USB directly into EZDrummer3 and without any config or anything have amazing sound!
But the kit is too short - or I'm too tall. And too fat.

Here's a short video going through a few highlights:
The Idea
I was sitting in my garage thinking about a way to get the drum kit higher so my knee isn't on the snare. My first thought was bed risers but there was no way my kit would stay on those. I literally turned my head in frustration and saw my crutches against the wall and thought I could do the same with the 4 legs of the drum kit. If it works for my heavy body, it should work for the drums.
I measured the inner and outer diameter of one of the legs after I took off one of the rubber shoes - those should just slide off with some effort.
Supplies
The only things I really needed were the tubes that slide into the legs and the metal buttons that go into those tubes.
| Aluminum Tubes | Clips That Worked | Clips That Don't!! |
|---|---|---|
 |  |  |
| Amazon link for 4 foot tube | Amazon link for clips that only need one hole | Amazon link for clips that require holes on both sides |
This is a 4 foot tube that I took my hack saw and trimmed down to 4, 1 foot segments. This was $26.99 when I got it, it's $29.99 now. Beware, there are 1 foot sections you can buy, but when I looked before 1, 1 foot segment was still almost $20.
I originally got the clips with the two buttons because that's how my crutches work, but then I realized (duh) I would have to drill all the way through the kit's legs and I didn't want to do that. I didn't want to cause any loss of support even though it would be stronger since it is reinforced with another tube. I decided to opt for the spring clips that only require one hole.Drilling into the segments

I don't have a ton of tools, so I had to think through my precision drilling without buying more stuff. I thought I could 3d print some guides to be able to drill holes 1" apart. I was able to drill 4 holes on each leg going up from the bottom. I started with the bottom of the guide flush with the bottom of the leg. That way all of the holes will be the same distance from the ends of the legs. That's the only truly important measurement. The holes do not have to be in an exact line as the tube inside will rotate if need be.
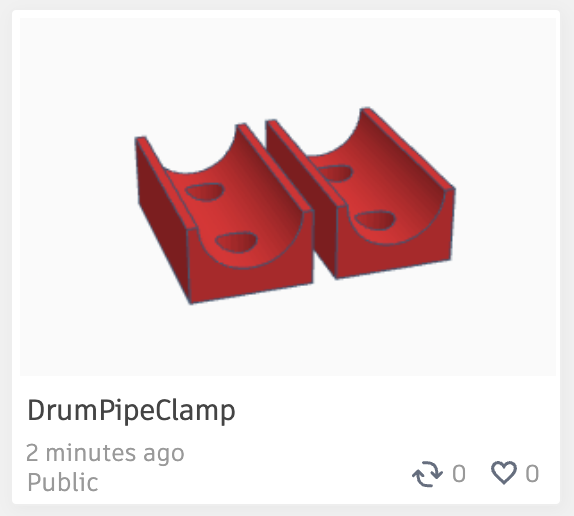 Tinkercad link to 3d print guide
Above is the link to the guide that you can print out if you have a 3d printer. If you don't, reach out to me and I can print you some for a few bucks if you are in/near the US. You can also see if there's a hackerspace near you where you can print it there too.
I had some plastic washers I put in the holes so I didn't mess up the 3d print. You can either find these washers at like Home Depot or something, or print with smaller holes. I used a 3/8" drill but be sure to measure your clips to see if that would work for you. It's also just like 1 mm too small so it doesn't fit perfectly. You can fix that if you want, but I just clamped it and drilled anyway:

The aluminum pipes will only need 1 hole for the spring clip. Then that hole will match up with the numerous holes you make in the kit's legs. I made sure to saw the aluminum pipes to be the same EXACT length so that there's no wobble with one leg slightly longer or shorter than the rest. Just like drilling into the legs, I put the guide flush with the end of the pipe so the hole is in the same place on all 4 pipes!!
Last thing - socks for the pipes

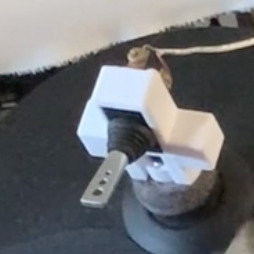
I didn't think fast enough for this one, but the rubber feets that come off of the legs are now going to live on the smaller tube so they were off by pretty much the difference in thickness between the inner and outer tubes. You can see the gap in the picture above. The last thing I had to do was 3d print some "socks" to put onto the ends of the aluminum tubes so that the rubber feet will fit. Here is the 3d model for that.
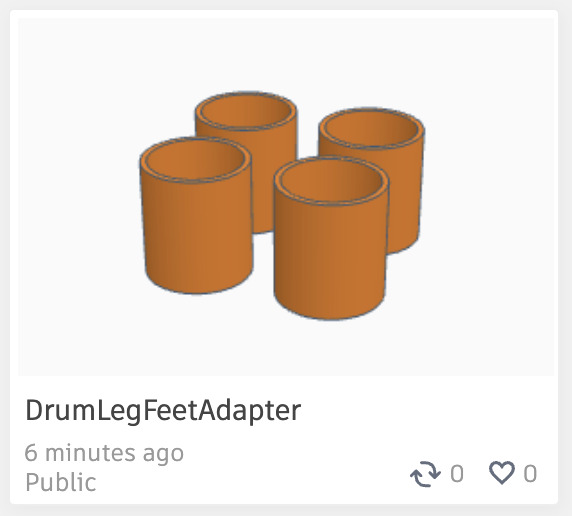 Tinkercad link to 3d printed feet adapters
You can also just use a few iterations of duct or gaffer tape too on the ends of the legs if you can't print the socks. Should work just as good.
Comments
Categories
- Stupid Stories 65
- On My Commute 31
- Computer Programming 21
- Italian Dual Citizenship 11
- Food 8
- Black Lives Do Matter 8
- The Beast 6
- Not So Stupid Stories 6
- Quick Projects 5
- Playing Out 5
- Movies I've Made 4
- Old Man Rants 3
- Scams 3
- The Robot Sbot 2
- Other's Music 2
- Film Projects 2
- Programming Tutorials 2
- Making Movies 2
- Rental Car Reviews 1
- My Original Music 1
- 3D Printing 1
- Ryvid Anthem 1


